|
|
|
| FNF -- THE FRIDAY NIGHT FRAG | ||||
| Main
Back to Tutorials |
Q3Radiant Entities -
26/08/00 and 30/08/00 and on...
You already no how to create an entity or two so now i'll go through some of the other entities and explain lots of stuff to do with lights and not_nulls and stuff. Firstly I'll deal with some of the more interesting stuff that can be done with lights. Throughout q3 there are colored lights, spotlights and many texture effects with special lighting effects attached. I'm working on a map to demonstrate how to make a red spotlight to give a good example of most of the light's properties. If you can't be bothered to read this and
you're smart enough to figure stuff out yourself you can download the
example .map file called example1.map from our downloads centre. (not yet
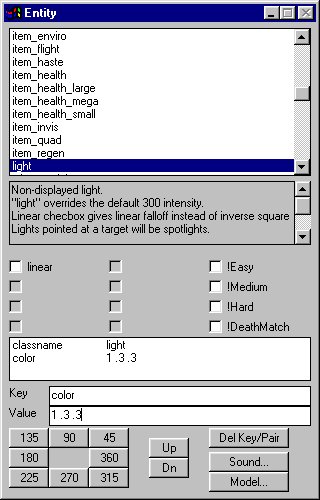
available sorry!) * * * * * Lights are fairly easy to manipulate firstly I shall introduce the '_color' key. Keys can be created easily in the entity box <N>, the key is called '_color' and the property is 'R G B' where R, G and B are numbers between 0 and 1 and represent the proportions of red, green and blue in the light's colouration. So to make a pure red light you would need to use 1 0 0. This is often far to pure and will make your level look far to q2ish.
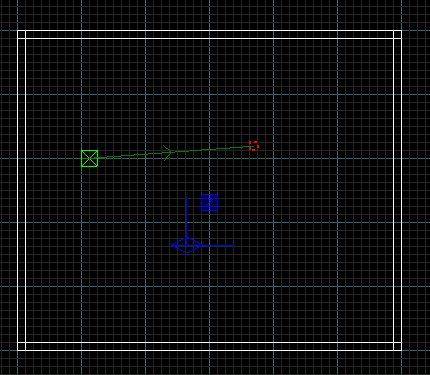
To target a spotlight make a target_location entity
and give it the key 'targetname' this key can have any string
property. Select the light source to make the spotlight come from and give
it the key 'target' and the same property that the target's 'targetname'
key had.
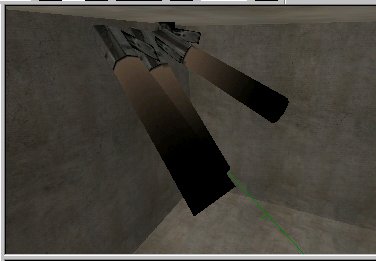
To finish off place a spotlight model <like in q3dm17 (The Longest 'we love this level' Yard)>, there is a model option in the entity menu under 'misc', when you choose it will prompt you for the model you want. You can change the model later by opening the entity box and pressing the model key.
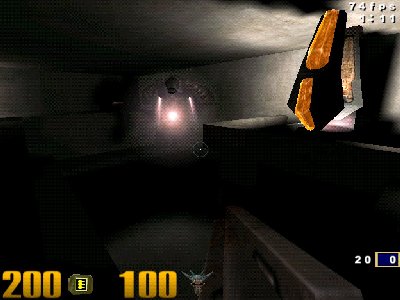
I'll do some more work on this tommorow. Meanwhile I could really use a coffee! (It's 1:33 am) * * * * * 06/09/00 - I put in those screenshots today. Anyway, that really is everything on the spotlight. I'll put example.map up soon. The end result should look like this:
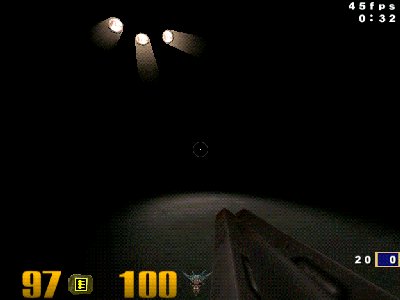
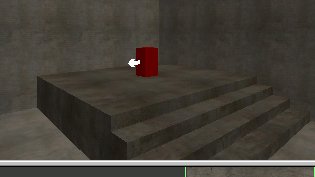
This effect is used a lot in good q3 maps so don't forget what has been learned here. For my next example I will skow how to make a basic level and I will go through the entities required to produce some of the more important features. Step 1: Make a room about 1000x1000 in floor area and about 250 deep. Place an info_player_deathmatch in one of the corners, place it on a raised square or highlight it with a spotlight. Make it stand out, I put mine on a block reached by stairs:
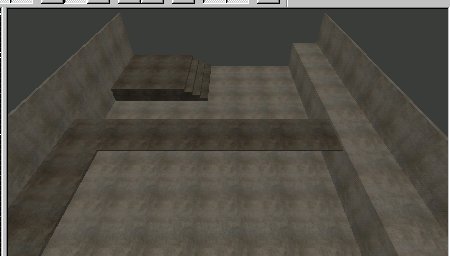
Next make an block 128 high against one of the walls opposite the spawn point and place it on the floor and make it wide enough to stand on (about 3 major grid squares should do). This will present the player with an unreachable platform. Create some walk ways coming from this platform so that your level effectively has two stories:
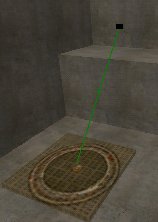
Now, the best way to transport our player to the top of the level would be a jump pad, these are common in q3 and so it seems appropriate that our level should have one. Choose one of the jumpad textures from the 'sfx' texture set and make a jump pad on the floor near the unreachable platform, you can use CSG subtract to place the brush in the floor. Now create an identical brush and place it on top of the jump pad, give this the texture 'common/trigger', this will provide the push. Now create a 'target_position' and place it above the place where you want the player to land, this will mark the apex of the jump. Make the trigger brush into a trigger_push by selecting the brush and bringing up the entity box, it should have the properties 'classname: trigger_push' and 'target: jump1'. Give the target_position the property 'targetname: jump1'. Move the brushes so that the green line doesn't cut through any intervening stuff. Hey presto, a jump pad. Check that it works by bsp_novis(nolight) compling. Now I'll show you how to place a weapon in a level, this is simple. Right click the map view and choose your weapon from the menu. Move the weapon to one of the higher platforms so as to make that jump pad useful. This is a small level so a shotgun or plasma gun would be appropriate. Weapons need ammo, placing ammo is similar to placing weapons. Right click the map view and instead choose the ammo menu and pick bullets, or the ammo for your new weapon. Place the ammo wherever you feel is appropriate. Take a break from doing this and add another spawn point, light the level and make some scenery. Lighting is important but should only be done after the main structure is complete so that you can highlight spawn points and such. Having only one method to reach the top is
a bit weak so I will now introduce the concept of teleporters. This map is
a bit small for teleporters but we can use one as an alternative way to
get from the top of the level to the bottom (without losing 5 health). To
create a teleporter firstly create a brush that encompasses the area which
the teleport model will sit in, give it the trigger texture or teleport
texture. Use the entity box to make this brush into a trigger_teleport and
give it the property 'target: tele1'.
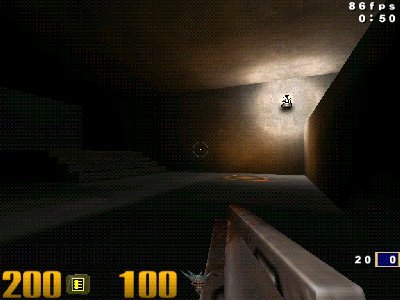
There is one last thing that our level could have, info_player_intermisson and an info_notnull. Basically the info_player_intermission is a camera that points at the info_notnull. This is for the end game where the scores are viewed against a backdrop, the info_player_intermission is pointing at that backdrop. Heres a shot of my version of this level in Quake 3, due to practice this only took me 20 minutes to create (about 5 minutes compiling cos my PC has no disk space!). Note some of the lighting effects and scenery used.
Now you should be familiar with many features of entities, try making some of the more complex effects yourself, like portals or shooters, they are all very similar. You now have the tools to make an average level, go forth and pratice.
|
FNF '...oh holy
Carmack whom did give us the Quake and the
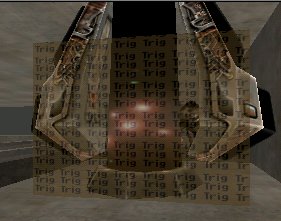
'color' should be '_color' in the screenshot, sorry!
The jump pad
Tip:
Ammo comes in clumps in levels so try placing two or three boxes together
along a wall or in a corner.
No, not all of my levels are so dark that they become impossible to play! |